01 - Git/GitHub Setup
Audience: First-time Git/GitHub Users
This article introduces the concept of Version Control by providing some motivation and background info, then provides steps for installing Git and setting up a GitHub account.
If you already have Git/GitHub configured, feel free to skip to the next article in the series.
What is version control?
Version control simply means tracking changes to a set of files over time, typically with the ability to access to previous versions of the files if needed.
When people refer to 'using version control', they are typically referring to the use of a Version Control System or VCS, a software tool designed to track changes and state for multiple files within a project.
Why do we need version control?
CIDA members are encouraged (required?) to use a dedicated version control system (specifically Git) to manage each of their projects.
For CIDA members, Git enables us to create reproducible analytical code bases, where the full history of the analysis is available to ourselves and those which we choose to share it with.
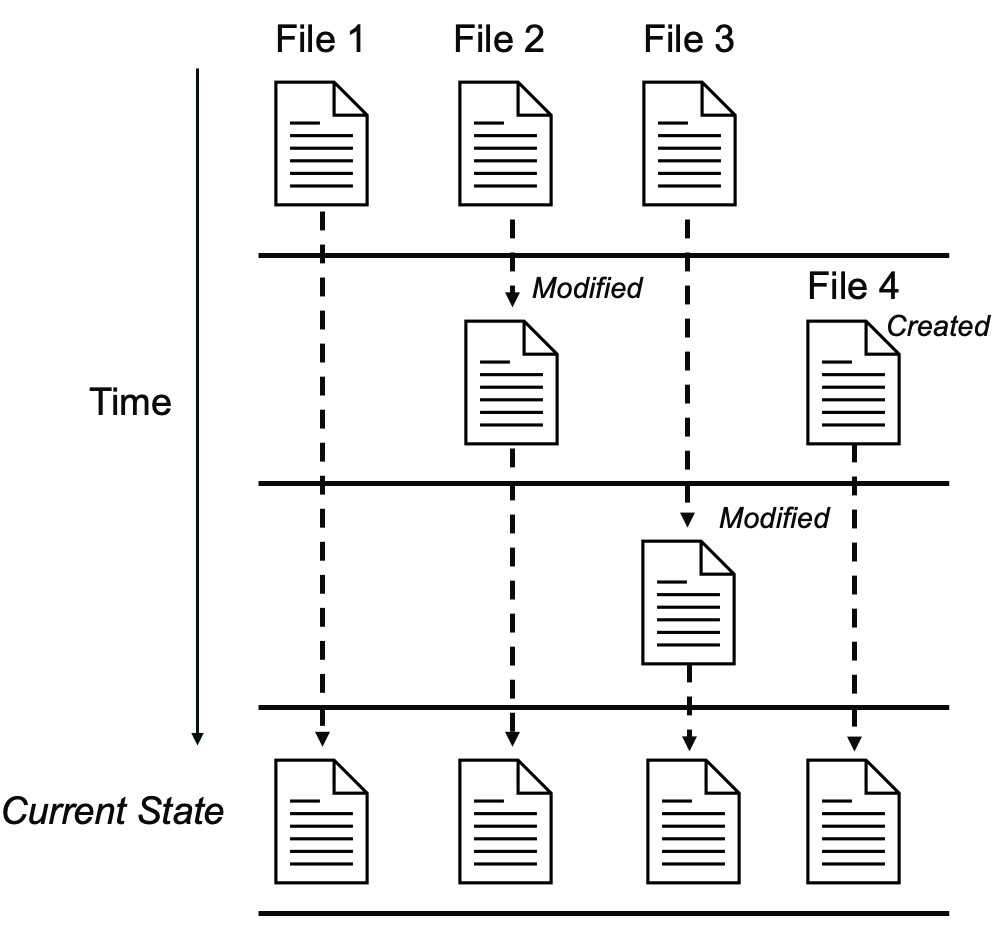
In the past, you may have encountered a situation like this:
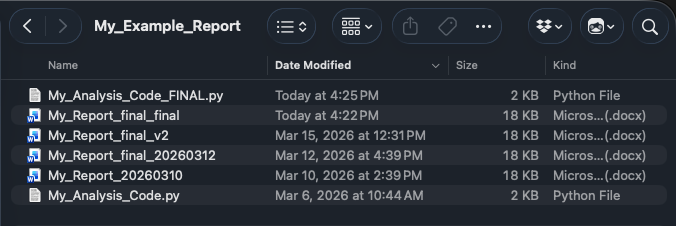
The above example shows a manual form of version control. The user is manually maintaining multiple copies/versions of report and code files and preserving older versions as they make changes.
This type of version control is functional in the short-term, but over time it can become convoluted, introduce errors, and hinder reproducibility and collaboration.
A dedicated VCS like Git is designed to solve this problem. Git can handle arbitrarily sized projects, and can track any type of file (Scripts/Notebooks, Reports, Tables/Figures, etc)
Introduction to Git and Version Control
Git was first released in 2005 as an open-source tool for managing the Linux kernel source code. Since then, it has become the VCS of choice for most developers.

Fun Fact
The Linux kernel surpassed 40 million lines of code in 2025, with contributions from over 5000 developers in 2025 alone. 1
Git can be used to maintain a complete version history for your project files:
- What changes have been made to each file?
- Who made the changes?
- When were the changes made?
A Git Repository is a term used to describe a group of files tracked by Git. In general, it is good practice to create separate Git Repositories for each of your projects.
For now we just introduce the high-level concept, but in the next article we will cover how to create and use a Git repository.
Creating a GitHub Account

On its own, Git is a powerful version control tool. However, one of the other benefits of version control is the ability to back up code online, and share code with others.
To allow for this, Git has the concept of a remote repository, an online location which mirrors a local repository located on your computer.
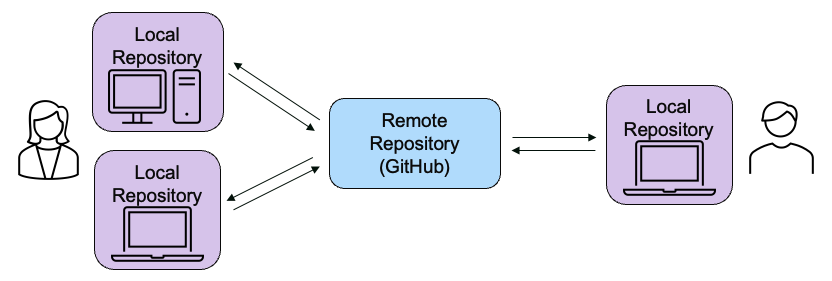
After configuring a remote repository, you can send changes to (push) or receive changes from (pull) the remote repository.
Although there are many options for hosting remote Git repositories, the most popular is GitHub.
CIDA GitHub Organization
CIDA has an official GitHub organization, which members can use to store code securely and collaborate with others. If you are a new CIDA member and need access to the CIDA GitHub organization, please email:
Git Installation
To get started using Git, we first need to install Git on our local machine.
Tip
If you prefer instructions in video format, video walkthroughs of the steps below are available here on OneDrive (CU email required) for both Windows and Mac.
1. Check for existing Git installation
Before installing Git, we can check to see if Git is already installed on the machine.
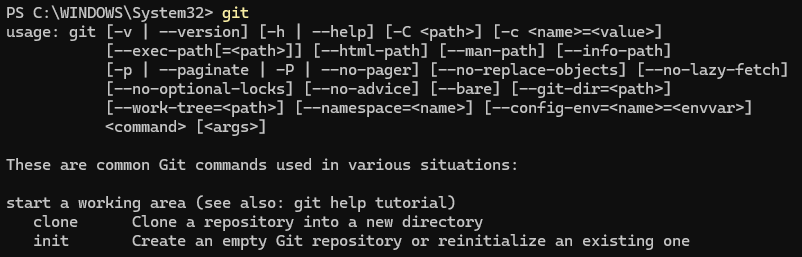
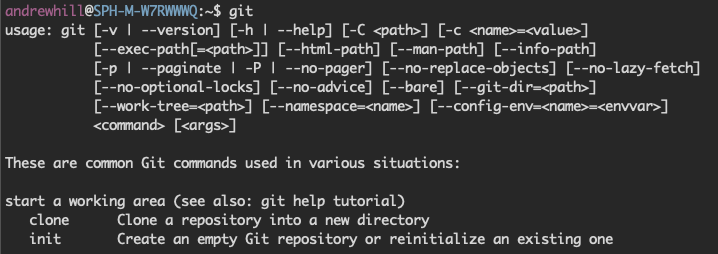
Open a Terminal (Mac) or Powershell (Windows) window, type git, and press Enter.
On Windows, a message like:
indicates thatgit is not yet installed.
On Mac, attempting to execute git when it is not installed will produce a mesage like:
and trigger a pop-up prompt to install the Command Line Developer Tools.
(If Git is not installed, continue to the Step 2 for your operating system)
2. Installing Git (Windows)
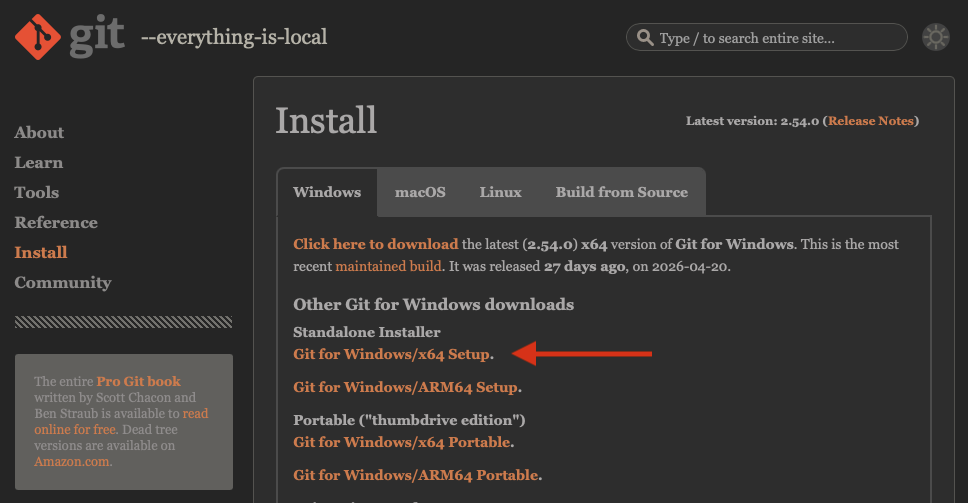
On Windows, you can download Git from the official Git website (https://git-scm.com/install/). We recommend downloading the Git for Windows/x64 Setup.
After downloading, run the installer. Default installation options are fine with two exceptions:
- We recommend setting the default branch name to
main(frommaster)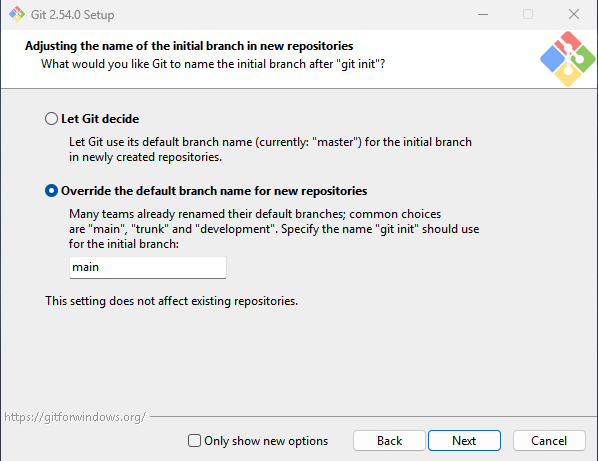
Override Default Branch Name - Ensure that 'Git Credential Manager' is selected for installation along with Git.
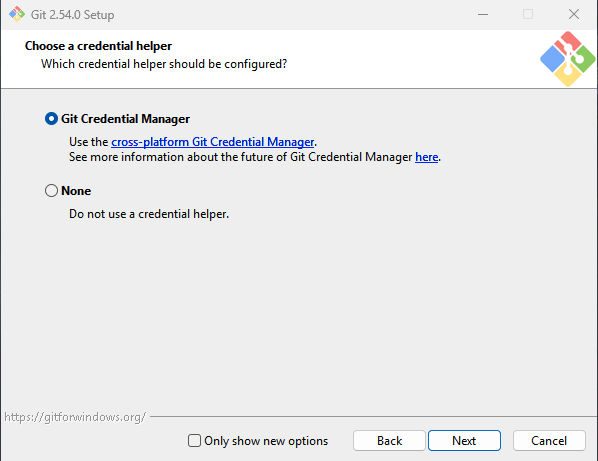
Git Credential Manager
Once the install is complete, you can open a new PowerShell window to verify that Git is installed.
2a. Installing Git (Mac)
If you performed Step 1 on a Mac, you may have encountered a pop-up prompting you to install the Command Line Developer Tools.
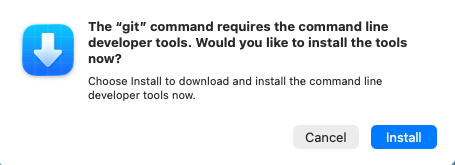
Simply select Install and wait for installation to complete.
After installing, you should be able to type git into the open Terminal window to verify that Git is installed.
2b. Installing Git Credential Manager (Mac-only)
If you are installing for Mac, you will need to install Git Credential Manager separately. This program is included in the Windows installer, but must be installed separately for Mac.
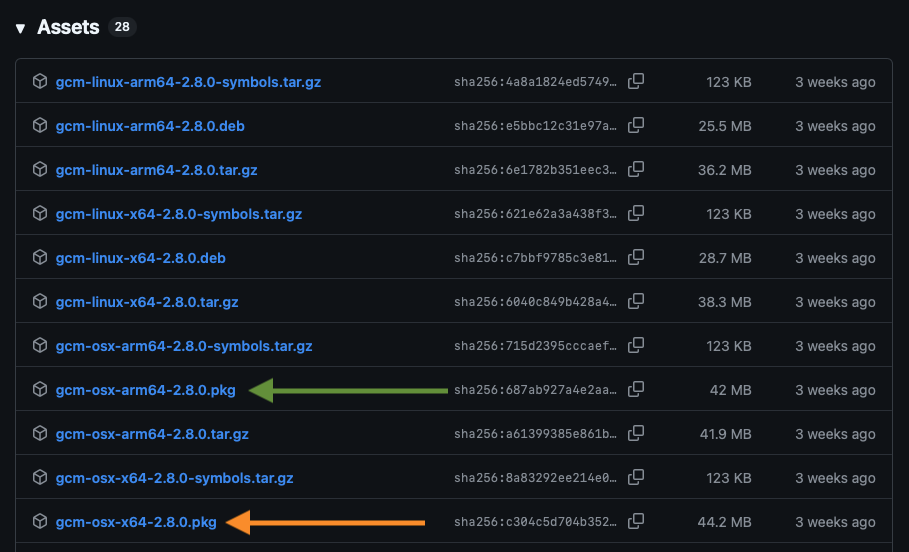
You can download Git Credential Manager from the Git Credential Manager GitHub repository:
Under the Assets section, choose either gcm-osx-arm64-*.pkg or gcm-osx-x64-*.pkg, depending on your computer's architecture.
If you are not sure, navigate to → About This Mac on the top bar and check the processor name under Chip:
Apple *→ Download thegcm-osx-arm64-*.pkg,Intel *→ Download thegcm-osx-x64-*.pkg
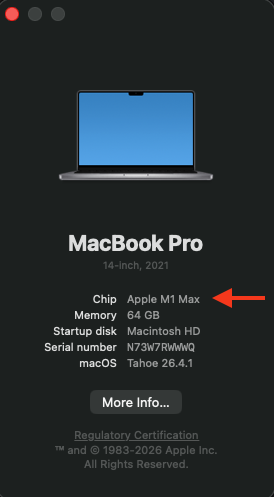
(Apple/ARM64 Chip)
You can also type the arch command in Terminal to print the architecture.
Git Configuration
Obtaining Git Credentials
STUB
Configuring user.name and user.email
STUB
Alternative Method - Git SSH Credentials
STUB